Homework 2
In this homework, we will train a convolutional network to classify images from SuperTuxKart.
This assignment should be solved individually. No collaboration, sharing of solutions, or exchange of models is allowed. Please, do not directly copy existing code from anywhere other than your previous solutions, or the previous master solution. We will check assignments for duplicates. See below for more details.
Starter code and dataset
The starter code for this assignment can be found here. The starter code contains several useful scripts:
bundle.pywill zip up your homework, ready for submission. Only submit zip files created by this bundling scriptgraderlocally grades your submission, works with both zip files and your homework directory.
The starter code also contains a data directory where you’ll copy (or symlink) the SuperTuxKart classification dataset.
Unzip the data directly into the homework folder, replacing the existing data directory completely.
Make sure you see the following directories and files inside your main directory
homework
grader
bundle.py
data
data/train
data/valid
You will run all scripts from inside this main directory.
CNN Model (10pts)
Implement the CNNClassifier in models.py.
Similar to homework 1, your model should return a (B,6) torch.Tensor which represents the logits of the classes.
Use convolutions this time.
Use python3 -m grader homework -v to grade the first part.
Relevant Operations
- torch.nn.Conv2d
- and all previous
Logging (30pts)
In this part, we learn how to use tensorboard.
We created a dummy training procedure in logging.py, and provided you with two tb.SummaryWriter as logging utilities.
Use those summary writers to log the training loss at every iteration, the training accuracy at each epoch and the validation accuracy at each epoch.
Log everything in global training steps.
Here is a simple example of how to use the SummaryWriter.
import torch.utils.tensorboard as tb
logger = tb.SummaryWriter('cnn')

logger.add_scalar('train/loss', t_loss, 0)
In logging.py, you should not create your own SummaryWriter, but rather use the one provided.
You can test your logger by calling python3 -m homework.acc_logging log, where log is your favorite directory.
Then start up tensorboard: tensoboard --logdir log.
Use python3 -m grader homework -v to grade the logging.
Relevant Operations
- torch.utils.tensorboard.SummaryWriter
- torch.utils.tensorboard.SummaryWriter.add_scalar
- and all previous
Training your CNN model (60pts)
Train your model and save it as cnn.th.
You can reuse some of the training functionality in train.py from homework 1.
We highly recommend you incorporate the logging functionality from section 2 into your training routine.
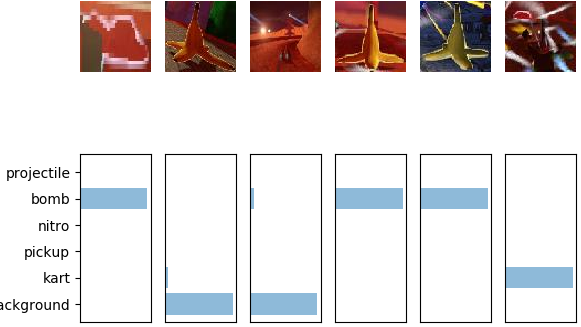
Once you trained your model, you can optionally visualize your model’s prediction using python3 -m homework.viz_prediction [DATASET_PATH].
After implementing everything, you can use python3 -m grader homework to test your solutions against the validation grader locally.
Your model should achieve a 0.85 test accuracy to receive full points.
Note that we will use a testing dataset to grade the accuracy part of your model, so your local grades are not guaranteed to be your actual grades. (Don’t overfit!)
Note
If you are normalizing the images, please do it in your models.py not in your dataset file, because our online grader will not perform the normalization in dataset.
Relevant Operations
- torch.nn.CrossEntropyLoss
- and all previous
Grading
The test grader we provide
python3 -m grader homework -v
will run a subset of test cases we use during the actual testing. The point distributions will be the same, but we will use additional test cases. More importantly, we evaluate your model on the test set. The performance on the test grader may vary. Try not to overfit to the validation set too much.
Submission
Once you finished the assignment, create a submission bundle using
python3 bundle.py homework [YOUR UT ID]
and submit the zip file on canvas. Please note that the maximum file size our grader accepts is 20MB. Please keep your model compact. Please double-check that your zip file was properly created, by grading it again
python3 -m grader [YOUR UT ID].zip
Online grader
We will use an automated grader through canvas to grade all your submissions. There is a soft limit of 5 submisisons per assignment. Please contact the course staff before going over this limit, otherwise your submission might be counted as invalid.
The online grading system will use a slightly modified version of python and the grader:
- Please do not use the
exitorsys.exitcommand, it will likely lead to a crash in the grader - Please do not try to access, read, or write files outside the ones specified in the assignment. This again will lead to a crash. File writing is disabled.
- Network access is disabled. Please do not try to communicate with the outside world.
- Forking is not allowed!
printorsys.stdout.writestatements from your code are ignored and not returned.
Please do not try to break or hack the grader. Doing so will have negative consequences for your standing in this class and the program.
Running your assignment on google colab
You might need a GPU to train your models. You can get a free one on google colab. We provide you with a ipython notebook that can get you started on colab for each homework.
If you’ve never used colab before, go through colab notebook (tutorial)
When you’re comfortable with the workflow, feel free to use colab notebook (shortened)
Follow the instructions below to use it.
- Go to http://colab.research.google.com/.
- Sign in to your Google account.
- Select the upload tab then select the
.ipynbfile. - Follow the instructions on the homework notebook to upload code and data.
Honor code
This assignment should be solved individually.
What interaction with classmates is allowed?
- Talking about high-level concepts and class material
- Talking about the general structure of the solution (e.g. You should use convolutions and ReLU layers)
- Looking at online solutions, and pytorch samples without directly copying or transcribing those solutions (rule of thumb, do not have your coding window and the other solution open at the same time). Always cite your sources in the code (put the full URL)!
- Using any of your submissions to prior homework
- Using the master solution to prior homework
- Using ipython notebooks from class
What interaction is not allowed?
- Exchange of code
- Exchange of architecture details
- Exchange of hyperparameters
- Directly (or slightly) modified code from online sources
- Any collaboration
- Putting your solution on a public repo (e.g. github). You will fail the assignment if someone copies your code.
Ways students failed in past years (do not do this):
-
Student A has a GPU, student B does not. Student B sends his solution to Student A to train 3 days before the assignment is due. Student A promises not to copy it but fails to complete the homework in time. In a last-minute attempt, Student A submits a slightly modified version of Student B’s solution. Result: Both students fail the assignment.
-
Student A struggles in class. Student B helps Student A and shows him/her his/her solution. Student A promises to not copy the solution but does it anyway. Result: Both students fail the assignment.
-
Student A sits behind Student B in class. Student B works on his homework, instead of paying attention. Student A sees Student B’s solution and copies it. Result: Both students fail the assignment.
-
Student A and B do not read the honor code and submit identical solutions for all homework. Result: Both students fail the class.
Installation and setup
Installing python 3
Go to https://www.python.org/downloads/ to download python 3. Alternatively, you can install a python distribution such as Anaconda. Please select python 3 (not python 2).
Installing the dependencies
Install all dependencies using
python3 -m pip install -r requirements.txt
Note: On some systems, you might be required to use pip3 instead of pip for python 3.
If you’re using conda use
conda env create environment.yml
The test grader will not have any dependencies installed, other than native python3 libraries and libraries mentioned in requirements.txt. pandas is not allowed for this assignment. If you use pandas or any library other than native python3 libraries and libraries mentioned in requirements.txt, your assignment will crash the canvas grader. Your local grader may not crash because you have the libraries installed locally.
Manual installation of pytorch
Go to https://pytorch.org/get-started/locally/ then select the stable Pytorch build, your OS, package (pip if you installed python 3 directly, conda if you installed Anaconda), python version, cuda version. Run the provided command. Note that cuda is not required, you can select cuda = None if you don’t have a GPU or don’t want to do GPU training locally. We will provide instruction for doing remote GPU training on Google Colab for free.
Manual installation of the Python Imaging Library (PIL)
The easiest way to install the PIL is through pip or conda.
python3 -m pip install -U Pillow
There are a few important considerations when using PIL.
First, make sure that your OS uses libjpeg-turbo and not the slower libjpeg (all modern Ubuntu versions do by default).
Second, if you’re frustrated with slow image transformations in PIL use Pillow-SIMD instead:
CC="cc -mavx2" python3 -m pip install -U --force-reinstall Pillow-SIMD
The CC="cc -mavx2" is only needed if your CPU supports AVX2 instructions.
pip will most likely complain a bit about missing dependencies.
Install them, either through conda, or your favorite package manager (apt, brew, …).